Tuesday, 20 November 2012

Wedding Table Center piece...

Morning everyone, hoping you had a relaxing weekend and conserved energy to face this week busy Thanksgiving event lol... I myself don't even wanna think of my "to do list" well not yet lol... procrastinating you might say :-0 
Ok, just wanted to share with you what I created for a friend's wedding this last Saturday and I must tell you I don't wanna see the color "Navy Blue" again for a very very long time! To be honest I feel like this after every project that requires me to make them in 20s, 50s or a 100!!! She asked me to make her table center piece and decorated her wine glass, plus smaller table pieces for the guest tables. Everyone loved them and most importantly she did, I was happy to know that being it was my first time doing something like this. Oh I might add that I also did the wedding invitations, which I totally forgot to take a picture of so I might have to come back and edit this post when I find mines... so here are some snaps...


Thank you guys so much for visiting and I hope you like them as well :-) Please leave a comment as I'd love to hear what you think. See you soon :-)
~Steff~

Saturday, 17 November 2012

Altered Canvas "Friends"

Hi there friends/bloggers :-) I would like to share with you my very first altered canvas... and may I add that it will not be my last... This was so much fun, you can just go on and on plying on stuff or not, it's up to you :-) The canvas measures 8x10inches, I decorated it with colors my friend and I love and I'm so hoping she loves it because I mostly create a kind of clean look, where as she love mostly grunge... ahhh I don't know how to do grunge (but it's on the list of things to learn lol).

 For the first layer I used 3 of my favorite satin ribbons pink, beige and chocolate brown (yum) then I added seam binding in between each ribbon to break them up. Ran them diagonal and cut to give a banner effect, layer a strip of designer paper from Colorbok. Embellished with frames, molds, pearls, baubles, chipboard pieces, flowers and stamp images from Prima stamp on transparency.

Thank you for your visit and I hope you like what I have created. Please leave a comment letting me know what you think :-) See you soon.
~Steff~

Thursday, 15 November 2012

More Handmade Birthdays gifts :-)

Hi friends :-) just want to share a couple more handmade items I made for a couple of my scrappy buddies. The first is an Origami box inspired by my YT friend "Bonnie" aka Sassyscrapper on YT she has a wonderful tutorial on how to create the Origami box and it is super easy to follow! 
Here's the link: http://www.youtube.com/watch?v=UPJd4Lwcr3s&feature=plcp 
http://www.youtube.com/watch?v=jOkppdjNjxA&feature=channel&list=UL
Please copy and paste in your browser, the tutorial is in two parts.

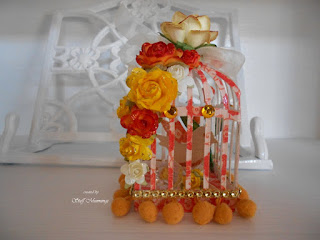
The other item is a 3D birdcage that I made using the Tim Holtz's Birdcage die and I also did a tutorial showing how to accomplish this and here's the link: http://www.youtube.com/watch?v=ULT9x0AUczk
So here they are...

 Origami box lid
 I made a tri-fold tag to go along with the Origami box.
 Tri-fold tag open
 3D Birdcage.
 A view of another side of it
 and a card


Some Items used:

Origami box and tag - K&Co "Classic K. Charlotte" papers (older stack)
Stamp - "Happy Birthday to you" from JustRite Stampers
Embellishments from my stash.

3D Birdcage - DCWV "The Crafty Stack" papers (older stack)
Tim Holtz Birdcage Die
Large Flower on top - WOC 40mm Trellis Rose (fav)
Card - Same paper line
Martha Stewart - Vintage Doily Punch
Stamp - "Happy Birthday" Stampin Up 
Frame - Sizzix & Hero Arts stamps and die sets
Embellishments from my stash.

Thank you so much for your visit. Please leave a comment as I do love to hear from you :-)
See you soon!
~Steff~